
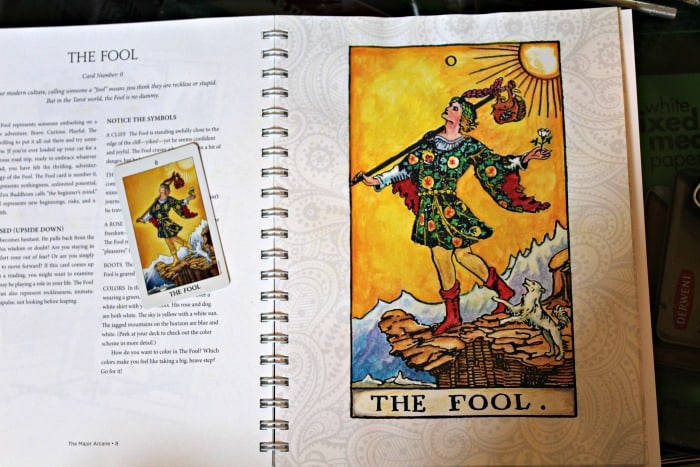
My husband is an artist so I shouldn’t have been too surprised when his work in The Tarot Coloring Book looked so cool. “How on earth did you get the Fool to do look just like the one in the Radiant Rider Waite deck?” The Radiant Rider Waite deck is my favorite version of the classic Rider Waite because the colors are vibrant.
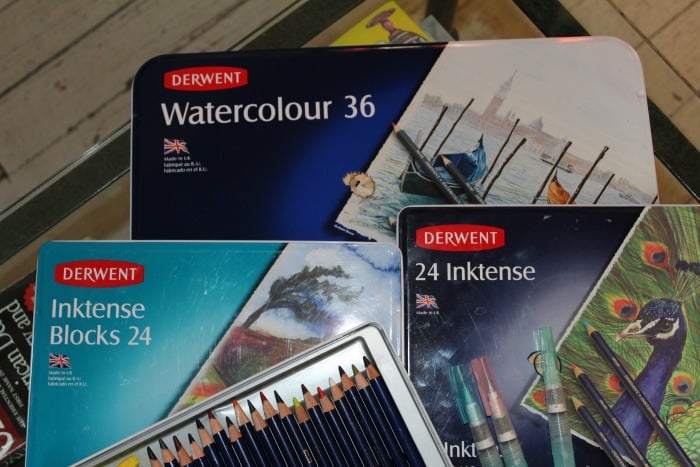
His secret: Derwent Inktense pencils and water brushes. Here’s a tutorial in his own words – with pics!
If you’ve never used this medium before, you are in for a treat. I discovered Derwent’s Inktense Pencils while searching for a new medium to work with for comic art and illustration at City Beast Studio.
I quickly realized that these would be perfect for working on The Tarot Coloring Book and decided to do some tests. The pages of The Tarot Coloring book are sturdy and quite capable of handling the use of water based mediums. I chose the Radiant Ryder-Waite Tarot deck (U.S. Games) as inspiration for my color choices and general style, so I could study/learn the traditional color schemes while coloring the cards.
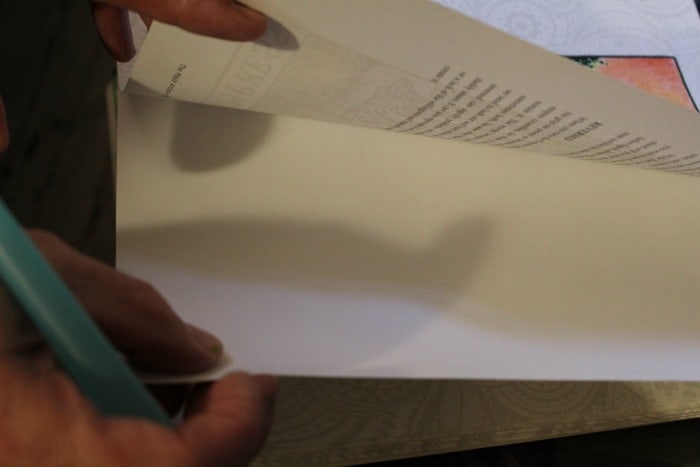
The paper holds up well to painting but you’ll want to put a piece of paper between the pages just in case it bleeds through (for example, if you use too much water).
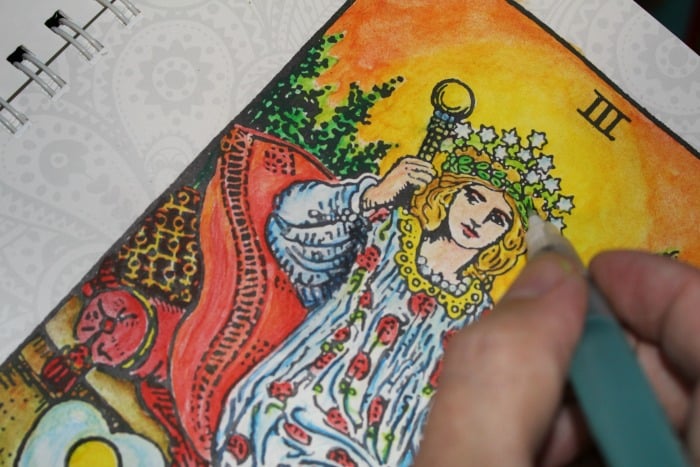
Start by using the Inktense pencils much like regular colored pencils. Remember that they will be blended with water later and plan for the effect you want. You might want to practice a little with them on some blank paper first, just to get a feel for how the ink blends and moves when water is applied.
Use a light touch where you want to blend colors in the dry phase. Too heavy a pressure, and/or multiple layers will build up a waxy surface which will not take any more color in the dry phase.
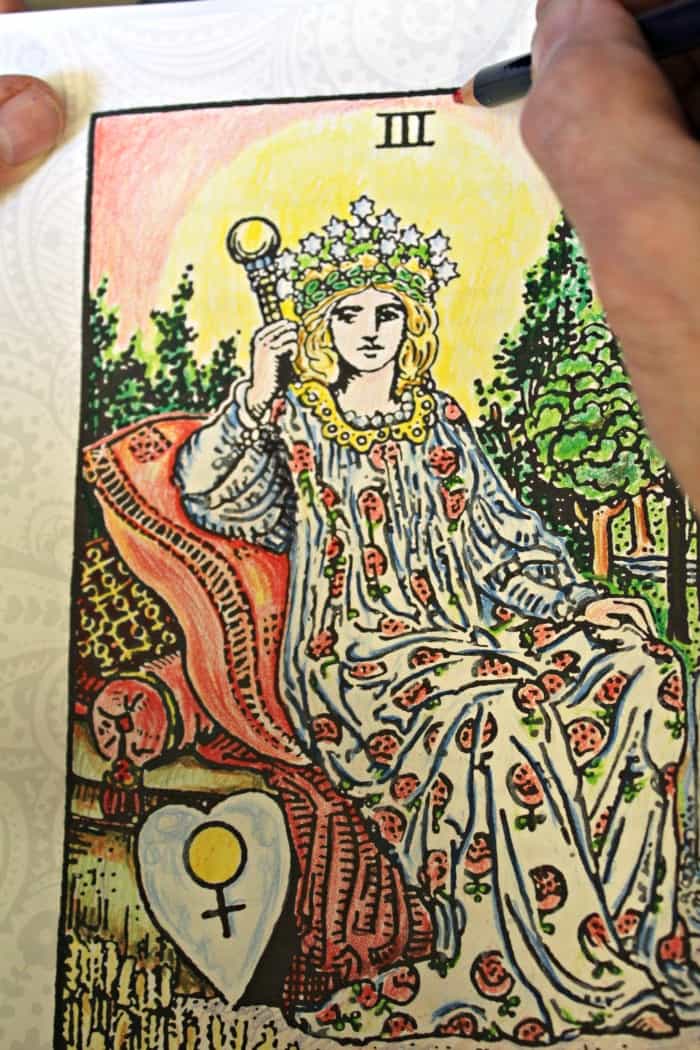
Start with your lightest colors first, for example a light coat of yellow can be applied first and a fade can be achieved by then adding a light layer of orange, carrying that to a red at the darkest areas, as demonstrated in the bright yellow sun-like halo effect around the Empress that turns into the orange and red sky behind her.

You may also apply color to some of the black lines If you so choose. Obviously it won’t be the same as coloring on a blank surface, but some color will come through and make your image pop just a little bit more (as seen in the printed red and yellow pillow behind the Empress).
Once you are satisfied with your dry phase colors, it’s time to break out some water brushes.
A regular brush and water can be used, but water brushes have fine pointed tips and allow for better control of how much water is applied in the brush strokes.
You have limited time to work with the colors once activated with water before they dry and become permanent, so you should find and keep a pace that allows you to work the colors as you desire before they dry. The ink will stay in place if you use a fine tip with a limited wetness for very detailed bits. The ink will blend and pool if more water is used. This is useful when blending and grading.
You might want to do small details first and let them dry. Then you can move on to your lightest colored areas. You may also want to use different water brushes for light versus dark colors, or at least wipe the brushes clean of ink before moving to another color to prevent your colors from becoming muddy.
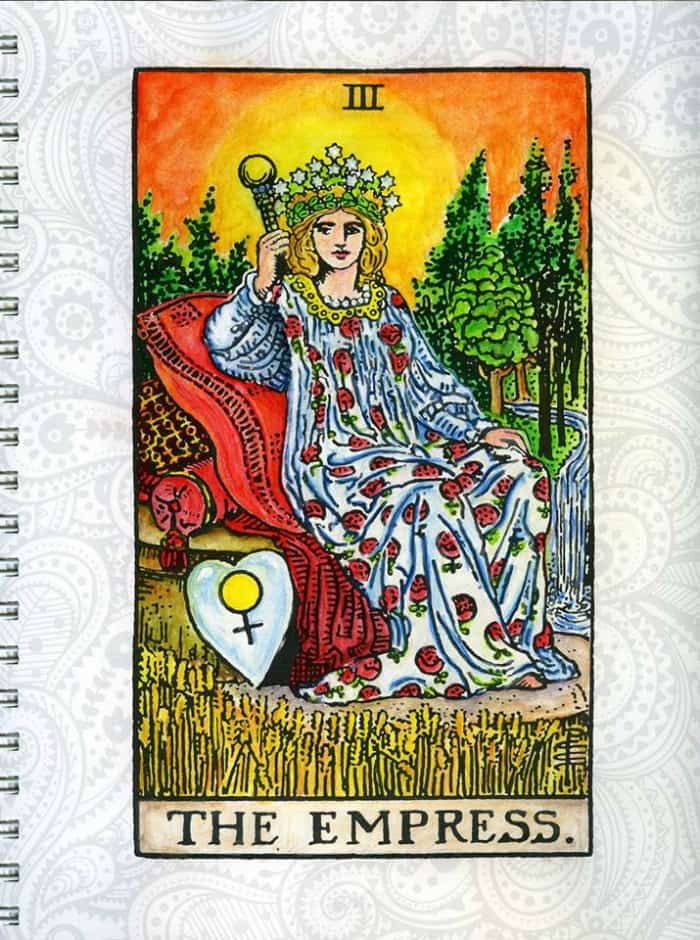
When you reach darker areas, you can pull the wetted dark ink into lighter areas to create gradation, fades, and shadows. A good example of this is the way the yellow halo of the Empress fades to the orange and red in the sky behind her. Or you can simply keep the brush a little dryer and contain it specifically to the area you want dark, if no blending is desired. The “antique” aged look on the cards name was created by using the white Inktense pencil for a base and just a little burnt earth and bark colors placed in the corners and dragged out over the white to create an old parchment-like effect.
Finally, if any areas need a little white highlight once you are done, you can add them in with a little white Gouache watercolor paint.
Once your image is completely dry, you will want to place your book under a stack of books to re-flatten the pages that may buckle and warp a little from wetting the paper.
And that’s about all you need to know to get started with this amazing, versatile medium that creates extremely vibrant colors. Derwent makes Inktense pencils in multiple size kits from 24 to 72 colors, as well as in block form.
I hope you find these tools and techniques helpful for making the pages of your Tarot Coloring Book vibrant and unique. They are, of course, also quite nice for working on original pieces of art, which you may find yourself tempted to get into once you have tried them on The Tarot Coloring Book and discover how truly wonderful this medium is.
~ Terry Reed
I hope this post inspires you to get all crafty ‘n stuff with your Tarot Coloring Book. Don’t let it sit on your shelf – bling it out!
Til next time: keep shuffling and keep coloring!
Blessings,
Theresa
© Theresa Reed | The Tarot Coloring Book 2016
See the entire How To Bling The Tarot Coloring Book series of tutorials.
Psst: show me your blinged out Tarot Coloring Book + creative ideas on social media! I wanna see it! Use this hashtag: #tarotcoloringbookbling
 I’m Theresa Reed (aka, The Tarot Lady). I’ve been a full-time tarot reader for 30+ years — which, in my industry, makes me pretty badass.
I’m definitely not your average Tarot expert — I drop the F-bomb, I quote rappers, and I’m obsessed with pop culture + reality TV. Folks come to me for straight-talk + tough-love — without the woo-woo fluff.
I’m Theresa Reed (aka, The Tarot Lady). I’ve been a full-time tarot reader for 30+ years — which, in my industry, makes me pretty badass.
I’m definitely not your average Tarot expert — I drop the F-bomb, I quote rappers, and I’m obsessed with pop culture + reality TV. Folks come to me for straight-talk + tough-love — without the woo-woo fluff.
You must be logged in to post a comment.